

If your Oculus Quest 2 (now known as Meta Quest 2) VR controllers aren’t behaving as they should, you may be the victim of controller drift!
While a drifting controller on a console (like the Nintendo Switch) can be annoying, in virtual reality it’s a much more severe issue. If your Quest 2 controllers are acting up, try one of these tips to (hopefully) solve the controller drift issue.
The Two Types of Oculus Quest Controller Drift
When someone refers to Oculus Quest 2 controller drift, there are two possible things they could mean. The most common is stick drift. This happens when the thumbsticks on the controller register input even when they’re in the neutral position. So your character may keep walking, or the camera will spin around even when you aren’t touching them, totally ruining your gaming experience.
The other type of drift is sensor drift. This only affects VR systems like the Quest or the old Oculus Rift, and happens when the positional sensors track where the headset and controller are but get it wrong. This can appear as controller tracking drift or even the entire VR scape. Some of the fixes below address this type of VR-specific drift.
Use hand tracking in a pinch
If you aren’t aware, you don’t need your touch controllers to operate your Quest or Quest 2. Assuming that your headset has been updated to at least the firmware version that supports the feature, you can use your bare hands with the hand -tracking feature.

Simply put on your headset and hold your bare hands up without turning on your touch controllers. This will activate hand-tracking and allow you to operate all the Quest’s menus. Some games and apps also support this feature, but in this case, it’s a useful way to access settings without the touch controllers.
Clean the tracking cameras
On the outside of your Quest are cameras that track the room around you and then calculate your head’s relative position in VR space. These cameras also track the exact position of the touch controllers.
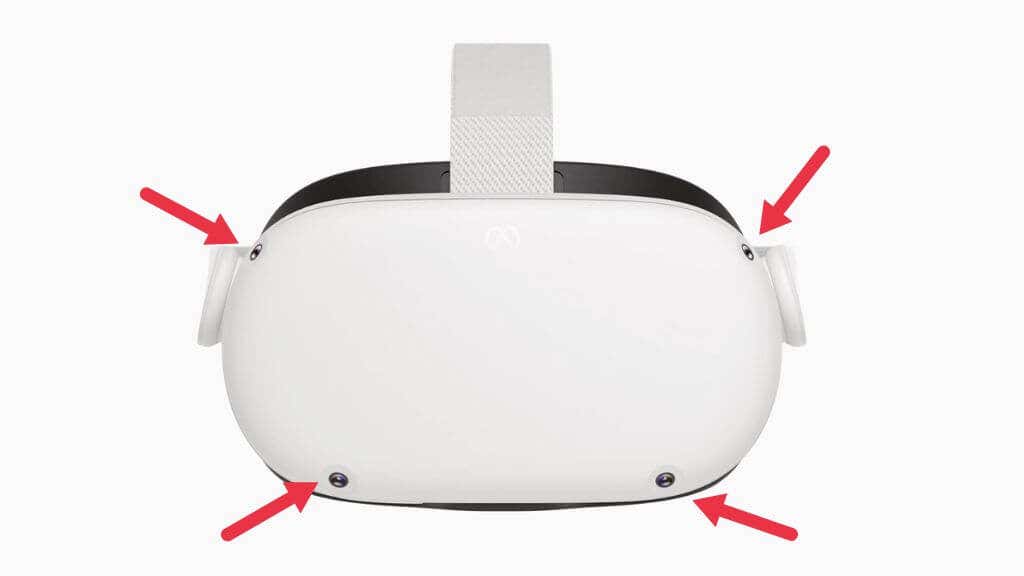
Use a soft microfiber cloth to ensure that these camera lenses are free from anything that would obstruct their view. Dirty cameras could reduce tracking performance and lead to controller tracking drift.
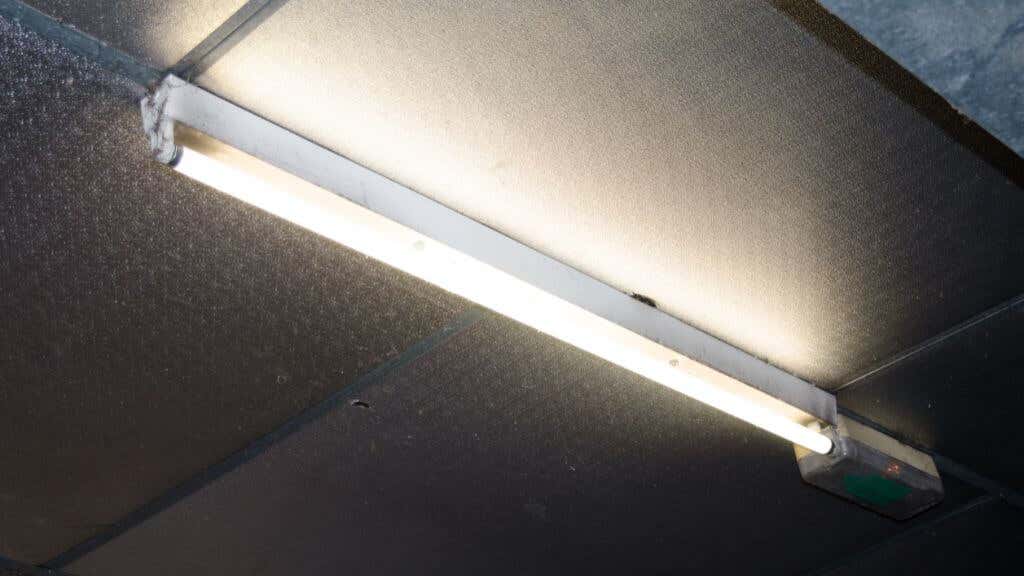
Use the Right Light Levels
Drift issues often result from light levels being too low or too high for the onboard tracking cameras on the Quest. While the Quest will warn you when the light levels in the room are too low, you may get tracking issues and controller tracking drifts even in conditions that are technically above the minimum.

The same goes for lights that are too bright, which can blind the cameras. As a general rule of thumb, if the light level in the room is bright enough for you to read a book but not so bright that it would bother you, it should work well with the quest.
Check the tracking frequency
In different parts of the world, electricity is generated at different frequencies. Although you can’t see it with the naked eye, if you were to take slow-motion footage of light in your room, you’d see it flicker on and off as the AC power cycles.
Not only is this flickering visible to the tracking cameras on the Quest, but it can also cause problems. This is why your Quest needs to know what electricity frequency your lights use. Double check that this setting is still correct if you’ve traveled between regions or somehow suspect that your settings have been changed or reset.
- Open the oculus app on your phone.
- Turn on your quests.
- Select Menuthen devices.
- Ensure that the correct headset is selected, scroll up, and select advanced settings.
- Select tracking frequency.
In most cases, it’s best to leave this setting on automatic. So if the setting is currently not on Automatic, change it back. If you’re getting issues while using automatic tracking frequency and you know that you’re using either 50Hz or 60Hz lighting, then try the correct manual setting to see if it clears up tracking issues, which may include controller drift.
Move Away From Signal Interference
The Quest Touch Controllers use wireless radio waves to communicate with the headset. Just like any other wireless system, they’re subject to interference. Consider if there are strong interference sources close to where you’re using the headset.
While, as far as we can tell, the Touch controllers don’t use standard Bluetooth, they’re almost certainly operating in the same 2.4 GHz band as Bluetooth and some bands of Wi-Fi. If your airspace is filled with lots of 2.4Ghz radio traffic, it could theoretically cause interference.
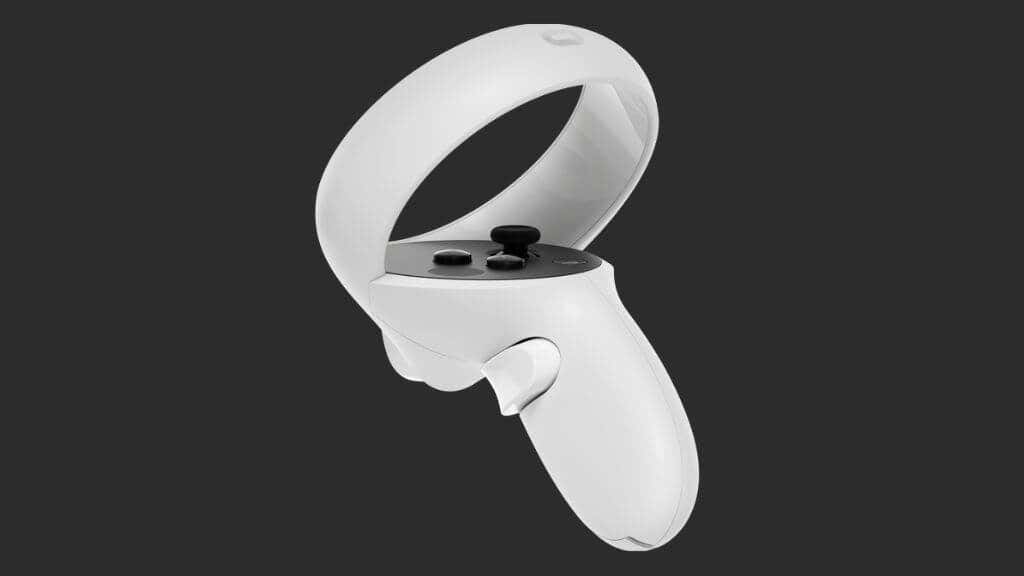
Take Out or Replace the Batteries
The Touch controllers have great battery life, measured in weeks or months. But they have to be replaced eventually. If you’re using rechargeable lithium AA batteries or another chemistry such as Nickel-cadmium, the voltage profile as the battery empties is different from the alkaline batteries the Touch controllers were designed for. This can make the battery meter report an inaccurate number.
Whether the batteries are the culprits for drift or not, replace the batteries with fresh or fully-charged batteries to eliminate this as a potential problem.
Reboot the headset
The Quest is, at its core, on an Android-powered computer. Just as we’d recommend for a buggy smartphone, it’s a good basic step to reboot your headset.
While wearing your headset, press and hold the power button until you see the power off screen.
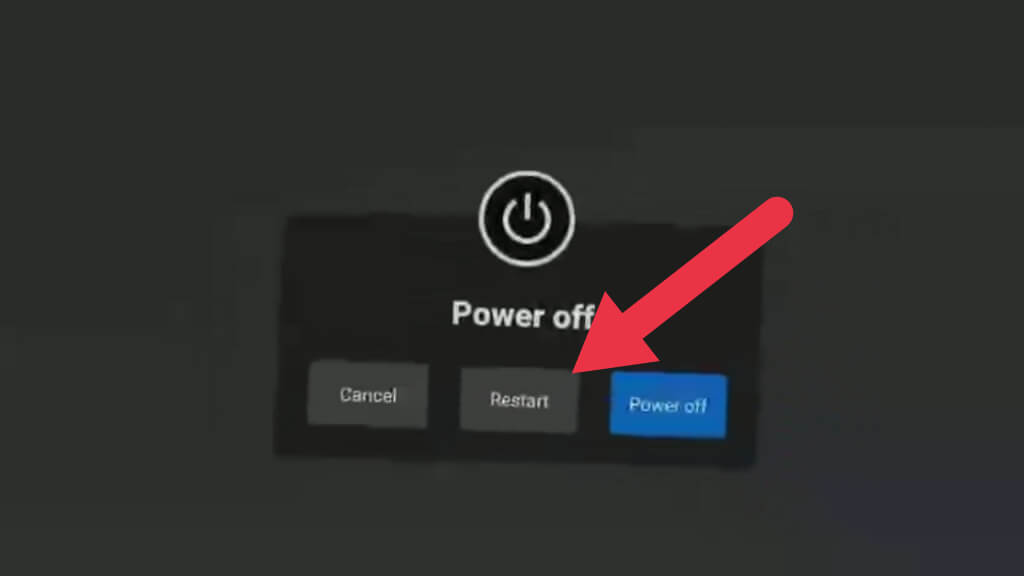
Select restart to reboot the headset or turn off, and then manually turn it on again. You can use hand-tracking to make this selection in case your controller is completely unusable.
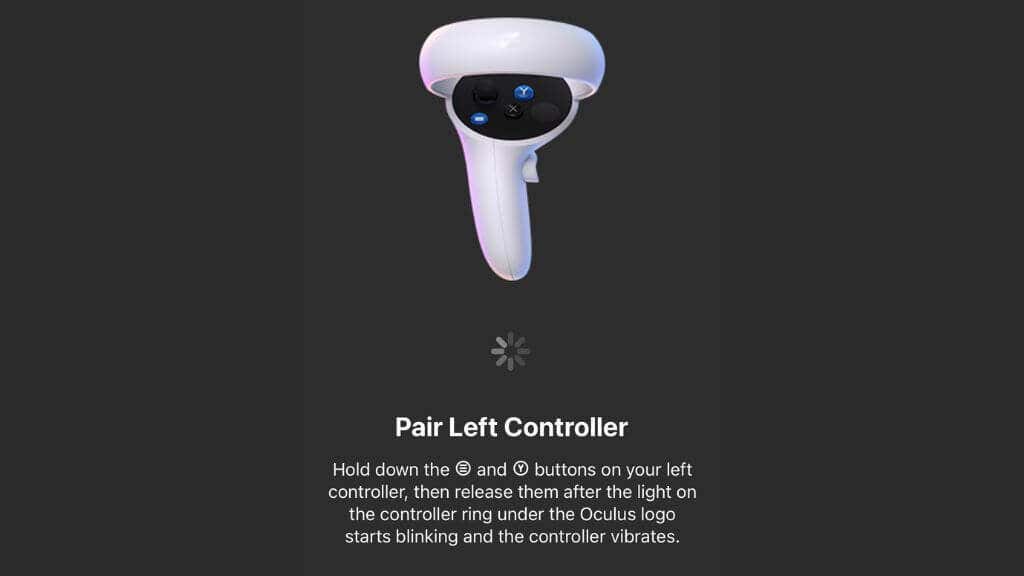
Pair the controllers again
Just like Bluetooth devices, your Touch controllers are paired with your headset. This process is already done out of the box, but when you get a new controller, you must pair it with your headset.
Unpairing and then pairing your controllers again can solve some issues related to controller drift if it’s related to wireless signal problems rather than tracking.
Pairing is done using the Quest companion app, so you’ll have to download and set up the app if you haven’t already. With that done, follow these steps:
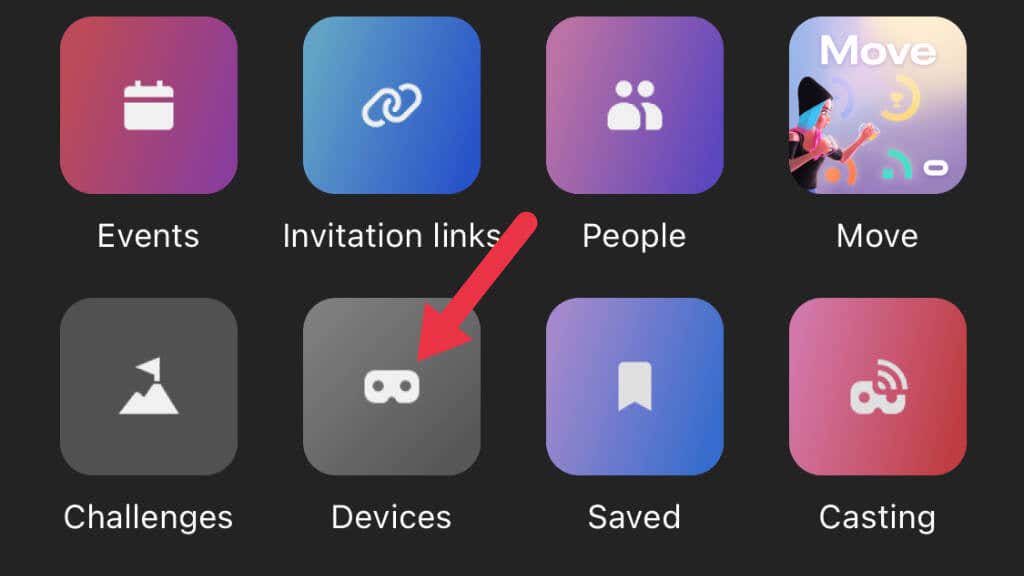
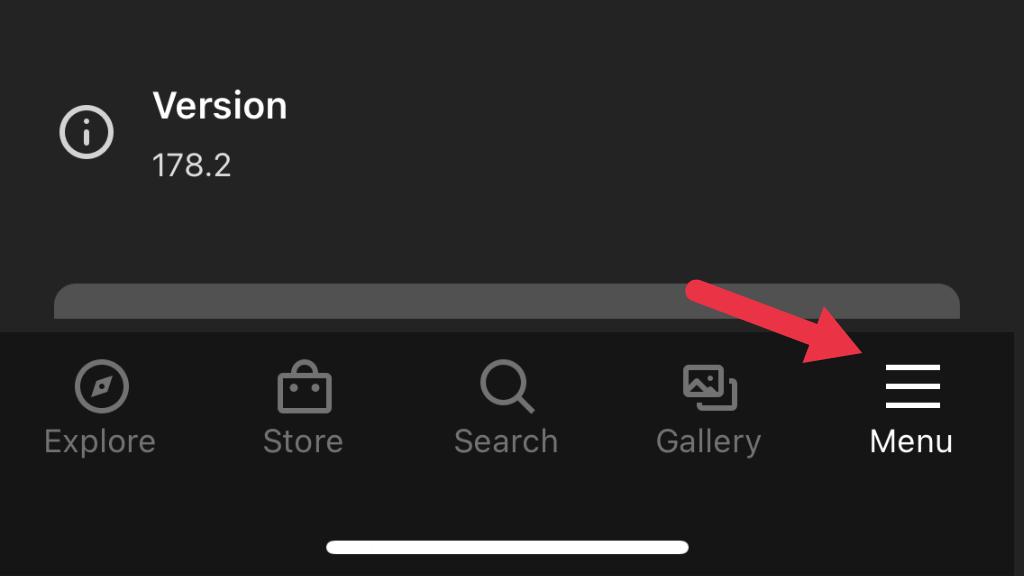
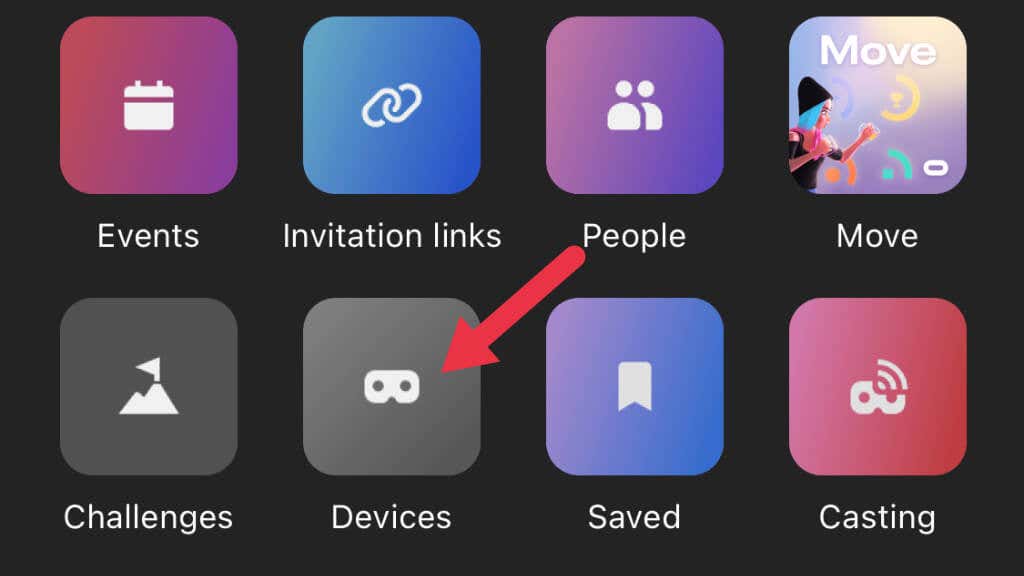
- Open the quests app.
- Select Menu.

- Select devices.
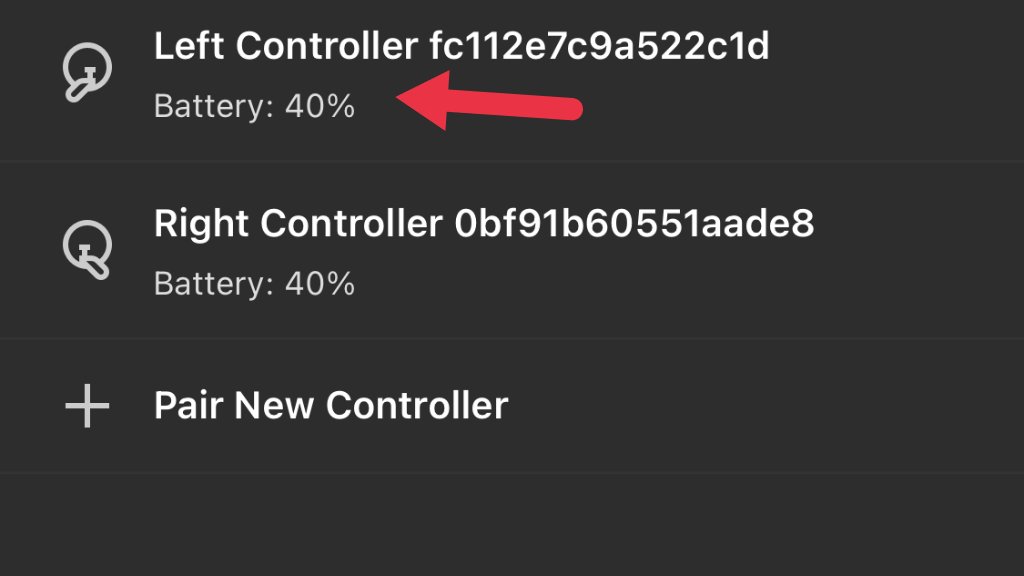
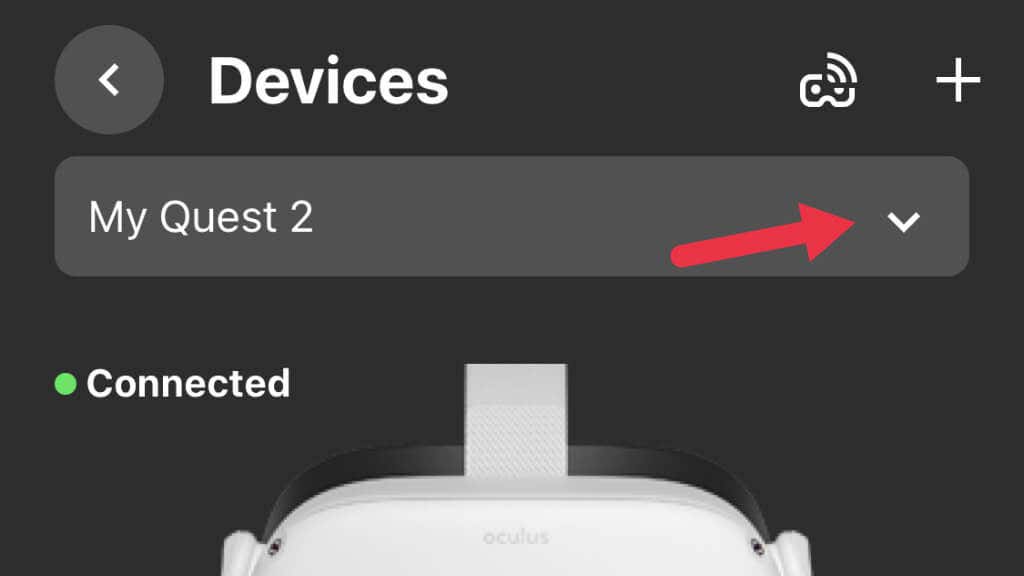
- Select the headset you want to work with.

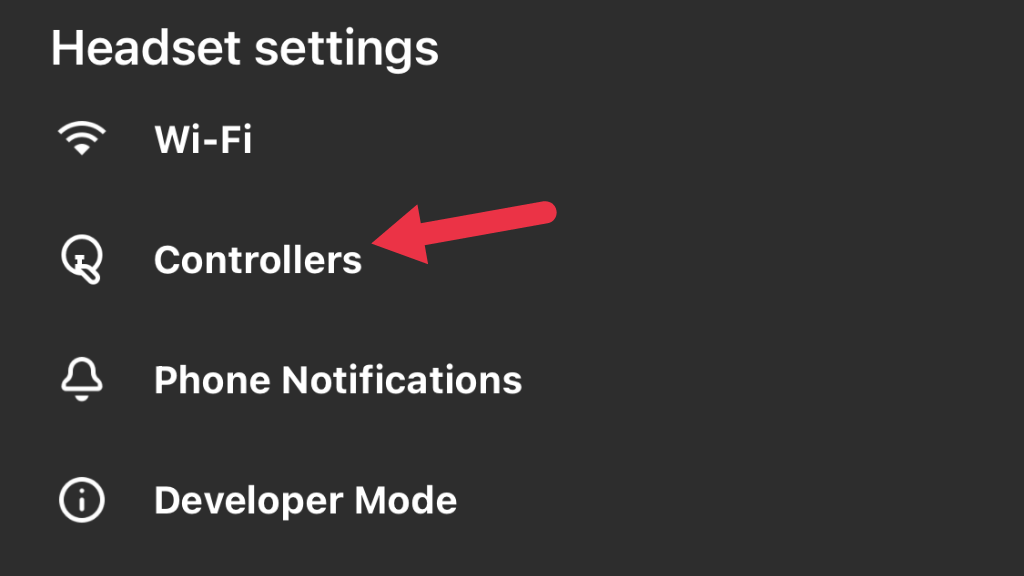
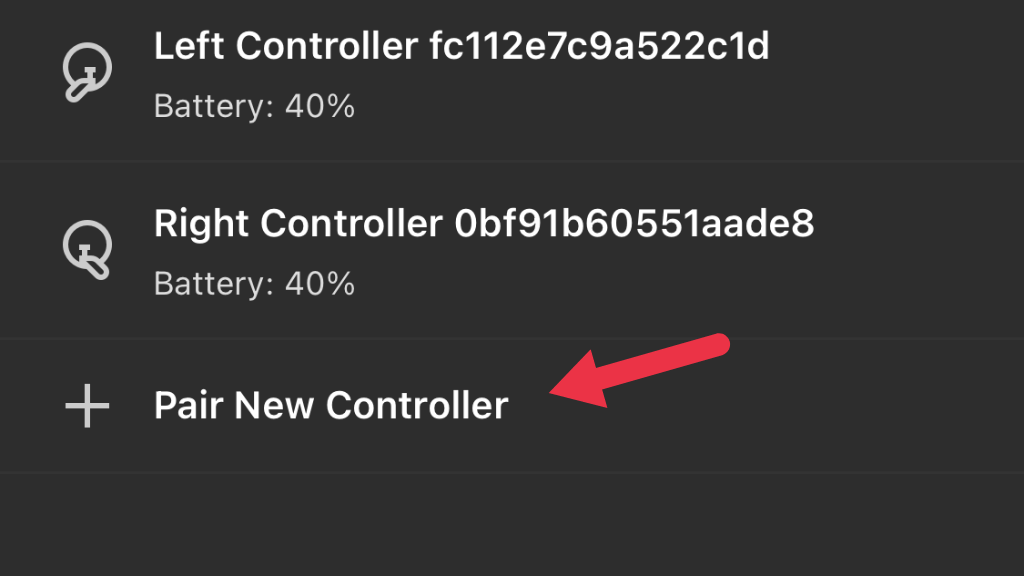
- Now choose controllersthen select the controller you want to unpair.

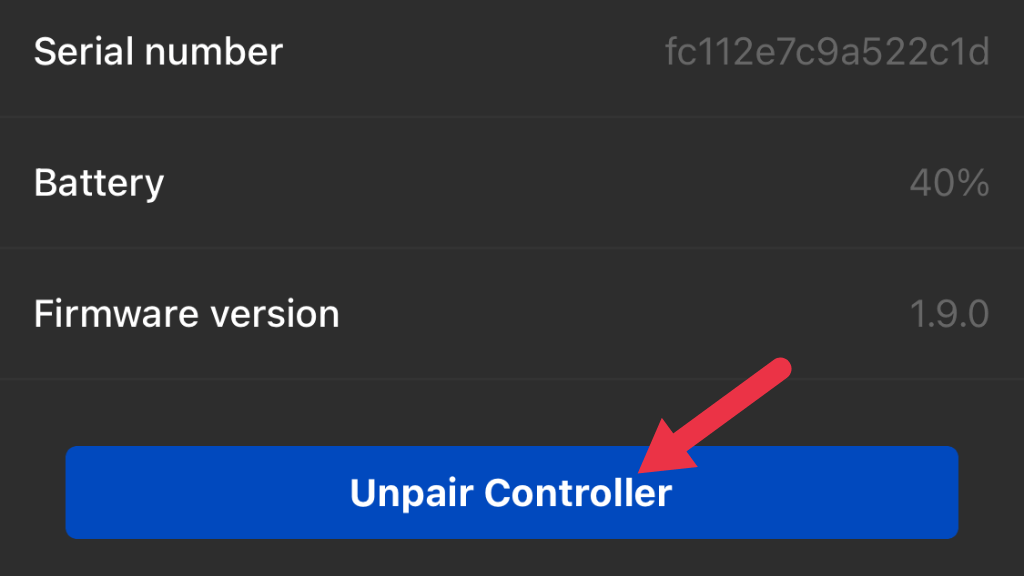
- Select Unpair Controller.
Now the controller is a free agent. For good measure, you may want to put in a fresh battery at this point. Next, we’ll pair the controller with the headset again:
- Open the Quest app.
- Select Menu.
- Choose devices.
- Select the headset you want to pair with then select controllers.
- Select Pair new controllersthen choose either Left or Right.
- Hold B and the system button together on the right controller, or on the left controller, Y and the system button. Do this until the LED blinks. Once the light stops blinking and stays lit, pairing is complete.
Now, test the controller to see if the issue is resolved.
Clean the controllers
When it comes to controller joystick drift, there are two main reasons it happens. The first is that the mechanism used to measure the analog stick’s position has worn it. Calibration can extend the life of this component, but eventually, replacement is the only fix.
The second cause is dirt, grit, and grime getting into that mechanism. A bit of compressed air blown into the gaps might do the trick. You may read advice online saying that you should flush the controller stick with isopropyl alcohol or disassemble the controller so that you can use an electrical contact cleaner.
If you’re brave enough, don’t mind voiding the warranty, and are confident in your skills, you can check out the iFixit teardown guide. However, as the guide’s author indicates, this only temporarily kept drift at bay. Once a stick starts drifting due to problems with the positional sensors, it seems inevitable that replacement or repair will be needed.
Do a factory reset
As a last resort, you may want to try doing a factory reset of the Quest 2 so that you can set it up as a new headset. Be warned that you may lose save game data for titles that don’t have cloud save features. We strongly suggest that you perform a cloud backup of your Meta Quest 2 before a reset. If a reset does nothing to help, get in touch with Oculus support for further advice.
Replace or repair the controller
If you can’t fix the stick drift in your controller no matter what, you can simply buy a replacement controller from Meta, which at the time of writing carried a price of around $75. We strongly recommend avoiding third-party or refurbished controllers on sites like Amazon, since we have seen numerous user reviews about these products not working correctly.
Repairing the controller by replacing the stick sensor is possible by buying replacement modules, but this is a third-party solution you use at your own risk! If your Touch controller is already out of warranty and you don’t mind taking a chance that could cost more than if you had bought an official replacement in the first place, it can’t hurt other than perhaps financially.
Comments are closed.